
How to Use the ALLA PRIMA Textures!
One Incredible HACK to Using the Alla Prima Textures!
Do you remember the clipping masks in Photoshop? This hack is sort of like that.
There are three components.
- A retouched image
- A colorful, painted, full bleed texture
- A monochromatic, contrasty, brushed topper like the Alla Prima ll textures (or veil, which would be harder to use here)
Number one will be your bottom layer in Adobe Photoshop. 2, the second layer, and 3, the top layer.
Set layer 2 to Hard Light (or whatever works best with your image) under layer mode.
Set Layer 3 to Screen.
MAGIC!
I didn't even take this through Corel Painter! It would be a fabulous prep file, but as is it's ready to print!
More in depth
I gently retouched my image first in Adobe Photoshop CC 2022 using a Wacom Intuos Pro medium tablet and basic tools (healing brush, stamp, etc). The beauty of controlling outdoor light with a strobe typically means less retouching is required. I'm working in Adobe RGB 1998 in a 16 bit file as it's an old habit from printing days. If you're working from a RAW file, I highly recommend retouching in 16 bit.
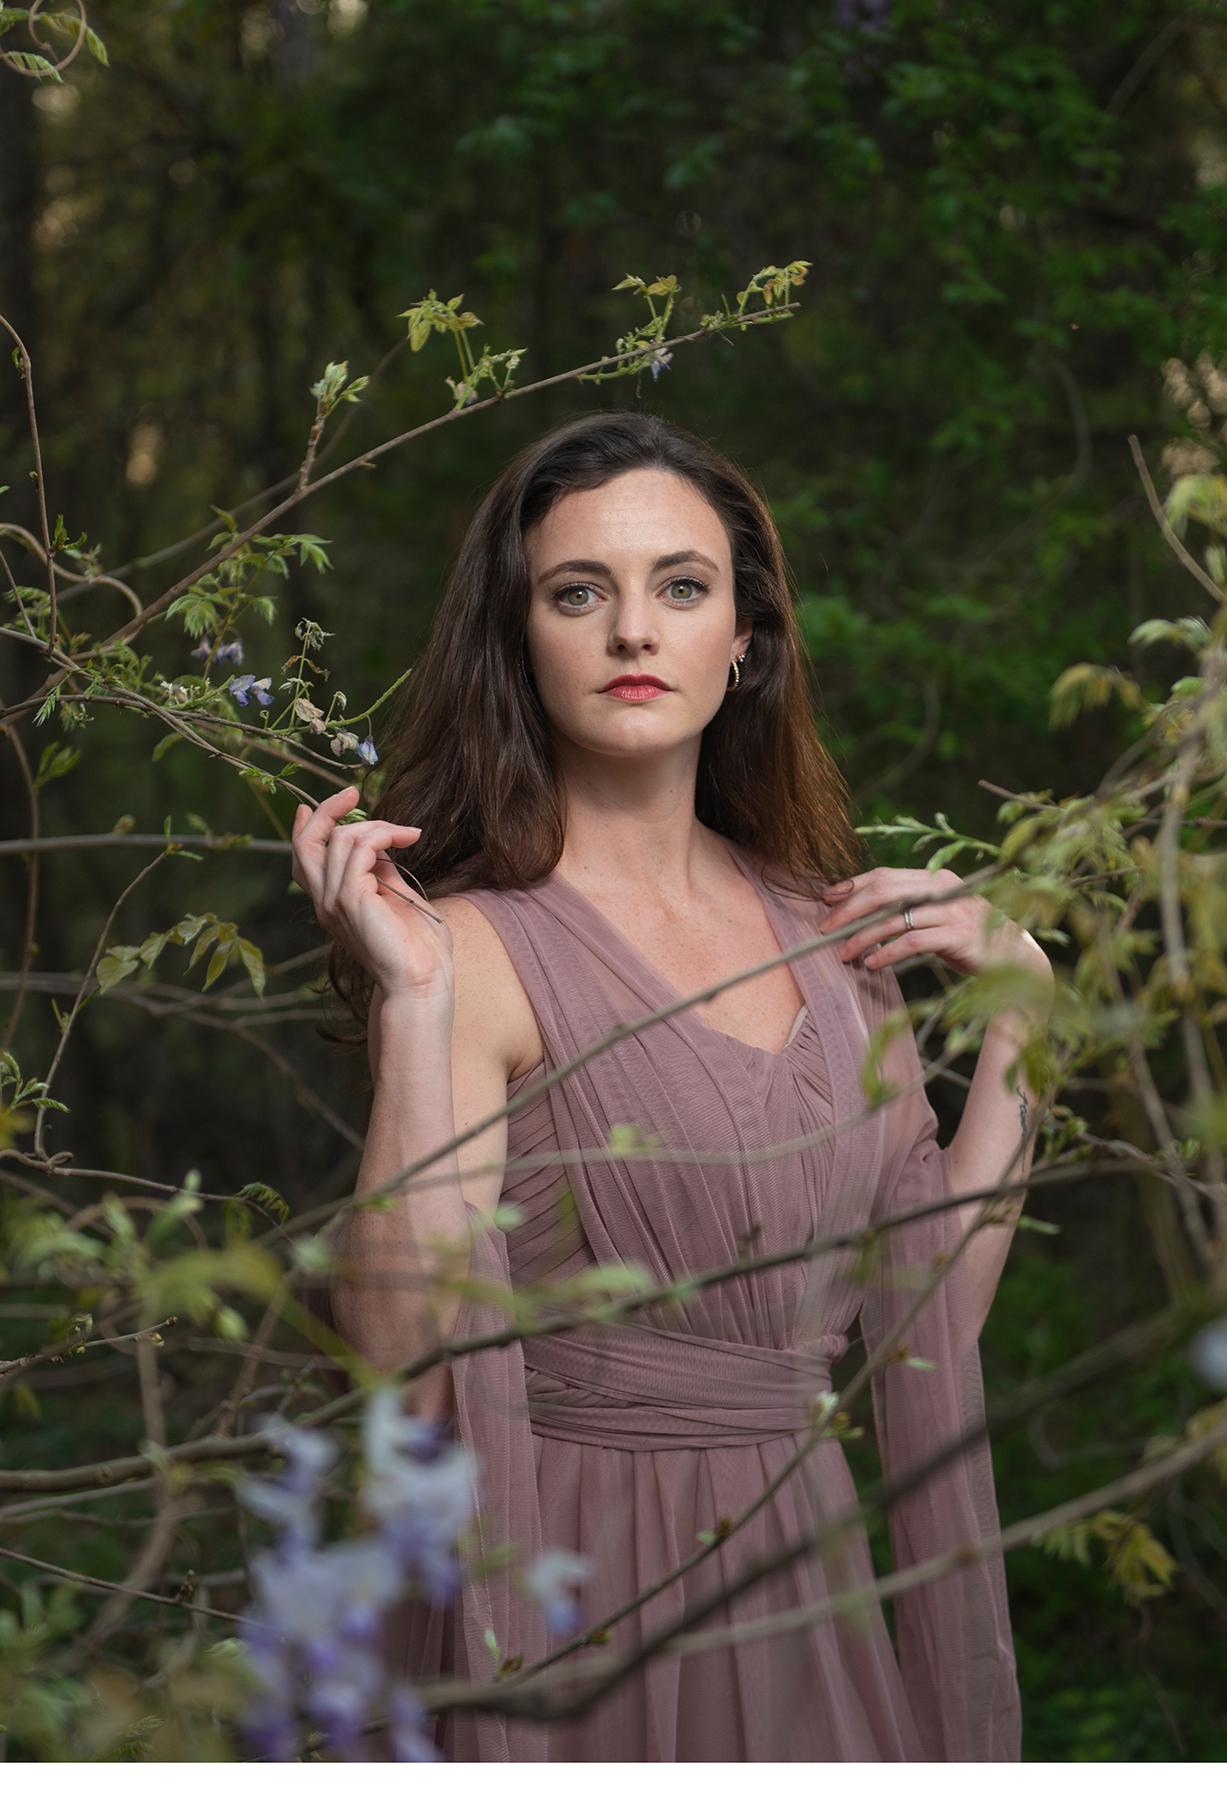
(Original retouched file)
I used the October Acids #21 for my middle layer as it seemed to give it a more painterly look (without having to paint the file). Setting the layer mode to Hard Light gave me the contrast and white point I liked. The layer mode may change depending on your file and what texture/background you choose. I was looking for something that would brighten it with more fleshy, lilac tones so it felt slightly like a watercolor AND to bring less attention to the sticks from the original file.
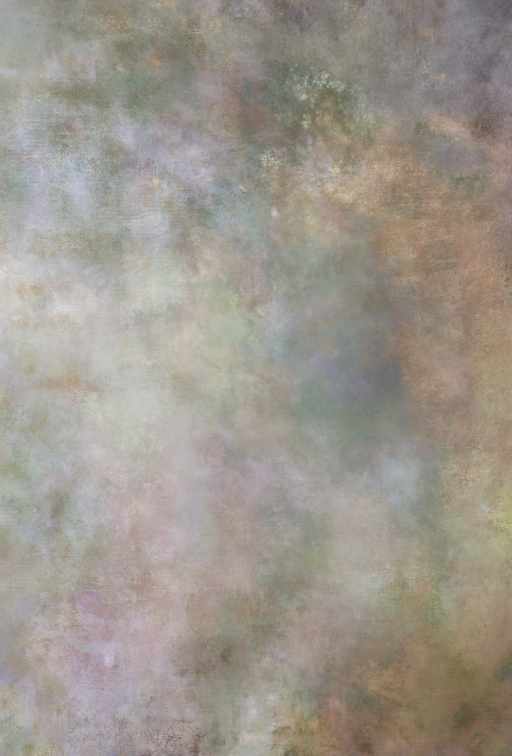
(October Acid #21)
Here's how the October layer changed my portrait.
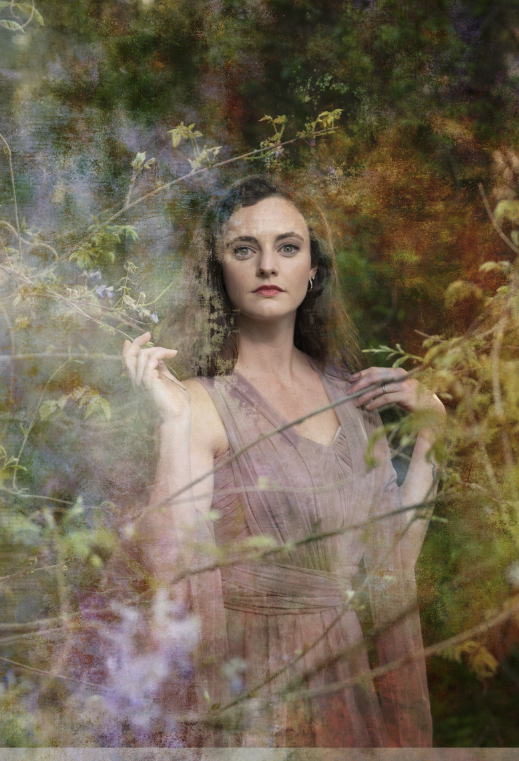
(Retouched portrait with October Acid #21 set to Hard Light)
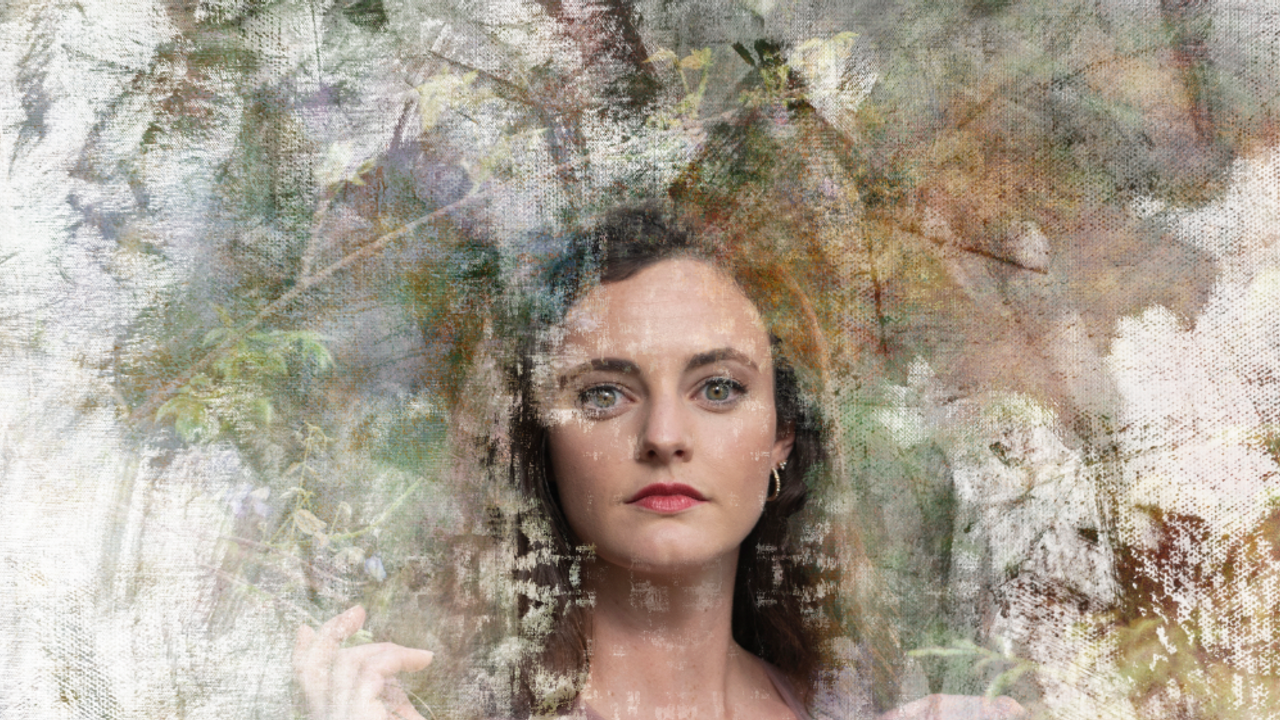
I selected the two of my favorite ALLA PRIMA ll textures, and meshed them together before bringing them over to this document. I also desaturated the layer completely as this works better. Some of the ALLA PRIMA have a blue, or warm tint to them, so if you run into hiccups, try desaturating the ALLA PRIMA layer. Notice how I'm trying to ensure the dark values are in the same place as my subject's face? Also notice how the brushwork at the top look like leaves? It's done on purpose.
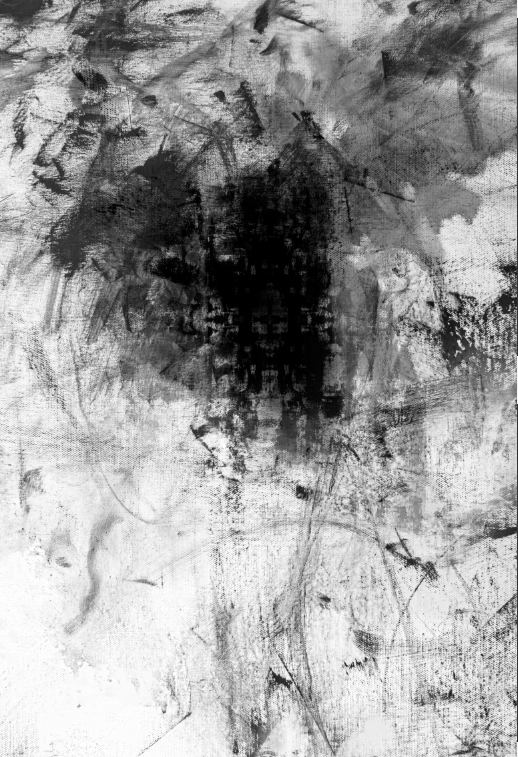
(ALLA PRIMA ll - 2 of my favorite layers, which I didn't note which I was using... sorry. Meshed together)
And this happened!
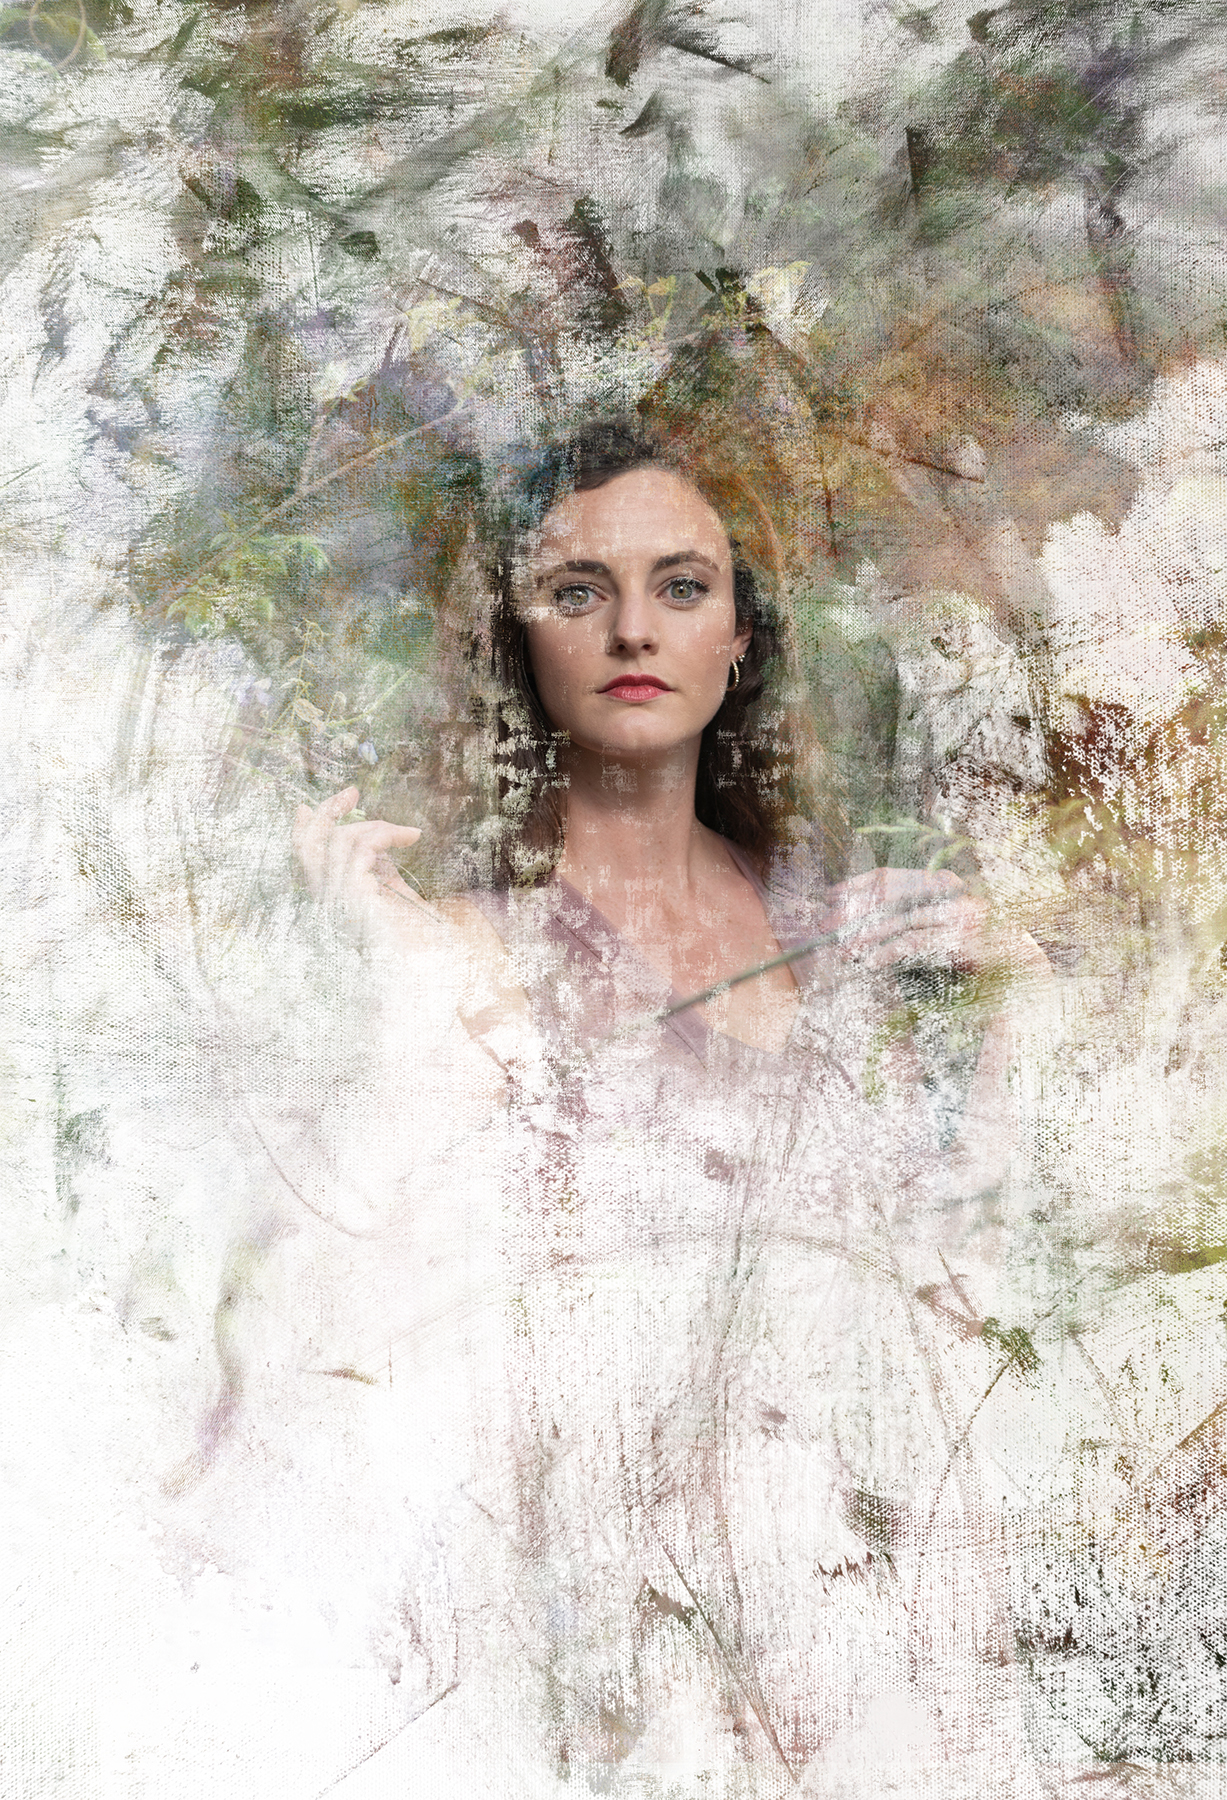
(Final)
Let's look at the layers in Adobe Photoshop CC 2022
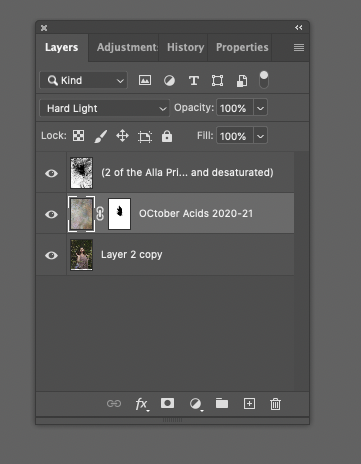
Notice I layer masked out a little bit of her face in layer 2 (The October Acids).
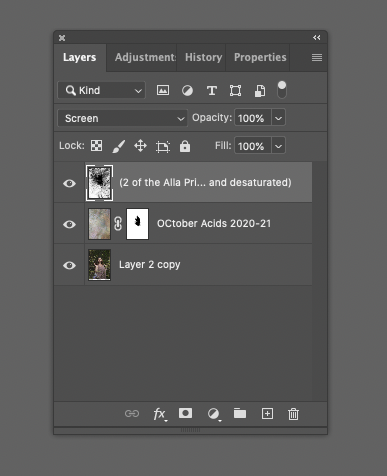
Set the top Alla Prima layer to screen and BOOM!
If you'd like to add the October backgrounds to your toolbox click HERE.
If you'd like to add the ALLA PRIMA ll to your toolbox click HERE.
Stay connected with news and updates!
Join our mailing list to receive the latest news and updates from our team.
Don't worry, your information will not be shared.